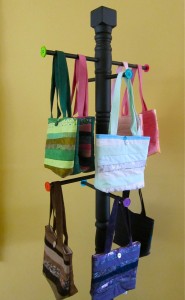
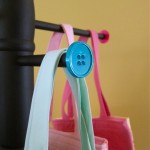
 Yep, it’s true. Kinda. Sorta. Well, it’s actually more that they hang from wood, as in the case with my new display stand. Purses just seem meant to hang, don’t they? So it is super exciting to have this display to use instead of balancing the purses on a table. Plus, I will be able to display more of my purses. I briefly mentioned this project and the inspiration that came from Hilda of Handmade Therapy a couple weeks ago. I put the finishing touches on the stand yesterday. Of course I had to use buttons somewhere in the project! They delightfully adorn the ends of each display arm.
Just as with the banner I made, I failed to photo document this fun project. Once I know what I need to make, I get all excited and just make it and then think afterward about how I should have photographed the process to share with all of you. One day I will learn.
The basic recipe for this stand is pretty straightforward. Enlist the help of a someone with tools, patience, and awesome problem solving skills (also known as Dad). Take a post intended for a banister (I suppose this piece would be one of the balusters, although I’m no stair expert). Cut to the desired height.  Use a drill press to make holes for the arms. Take some wooden dowel of the appropriate diameter and insert through holes. Cut four pieces of wood to create a basic, but attractive base. Screw base to the stand. Sand. Paint. Paint again. Use a hot glue gun to fix big colourful buttons onto the end of each arm for a quirky finish. There is a cheerful pink sign to sit on top of the stand, which simply attaches via the miracle of magnets. Viola! A home for purselettes. Thanks for all your help Dad! Loved wondering around Rona, brainstorming ideas!
Now I just have to play around with displaying my small zip purselettes on the table, since those gals don’t hang…

Oh it turned out so great!! I love the buttons on the ends!
Thanks Hilda! I’m lovin’ it too! It should work great as a display for my purses, and possibly for my scarves in the winter too.