Valentine’s is just around the corner. Thought I would share one more “heart themed” button craft with you. This one is from Buttons Galore & More. These little rustic fabric hearts decorated with buttons would make a very nice gift, for the young or old. All you need is some plain or linen fabric, buttons, thread, ribbon, and polyfil. If you’re short on time, you could always use some hot glue to attach all the buttons, instead of sewing them (although they look more adorable stitched). Check out the full tutorial for all the details. And enjoy your Happy Hearts Day!
Tag: ornaments
DIY candy cane ornaments
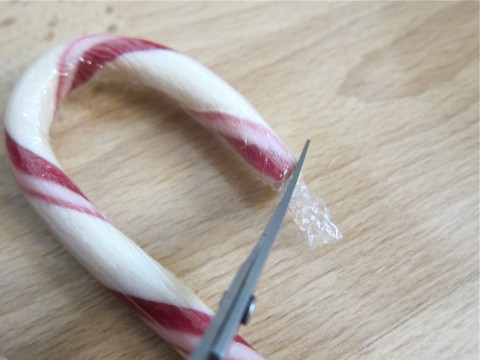
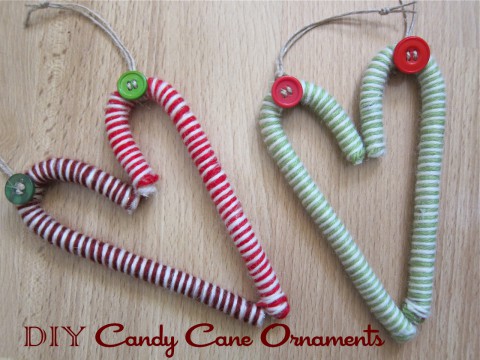 FINALLY!! A tutorial. They’ve been so lacking on this blog, my sincere apologies. I always have the best intentions of trying to put them together to share with you, and then they get stuck at the needing-to-photograph-each-step stage or the needing-to-edit-things stage. But finally, here is one done & ready to share! A simple project to whip up, just in time for Christmas too! These DIY Candy Cane Ornaments were inspired by some yarn wrapped candy canes from Family Chic. I’ve added my own twist to them, of course, by adding an adorable button hanger! So let’s get crafting.
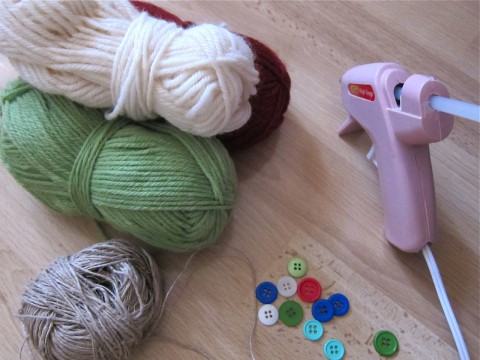
- balls of yarn (I used two different colours per candy cane, a creamy white & either red or green)
- box of edible, full-sized candy canes
- hot glue gun & glue
- scissors
- twine
- buttons (need to use buttons with four holes)
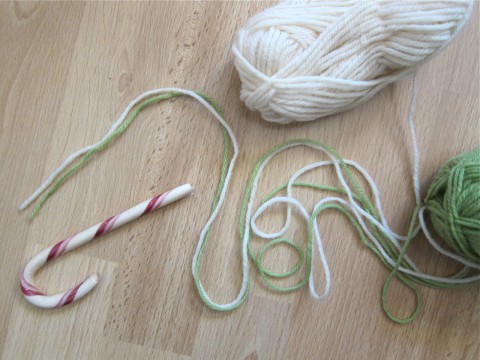
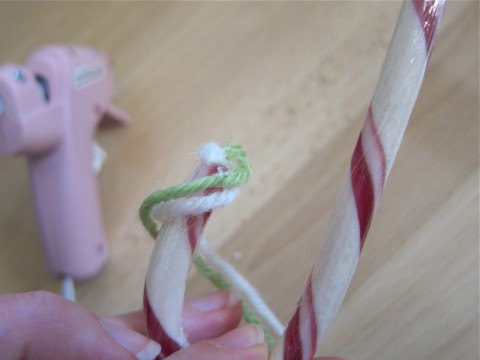
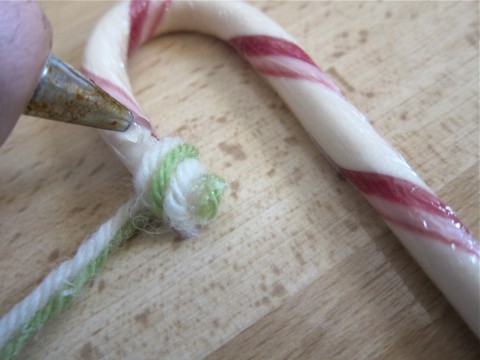
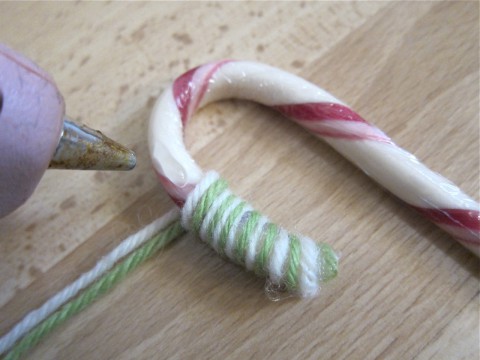
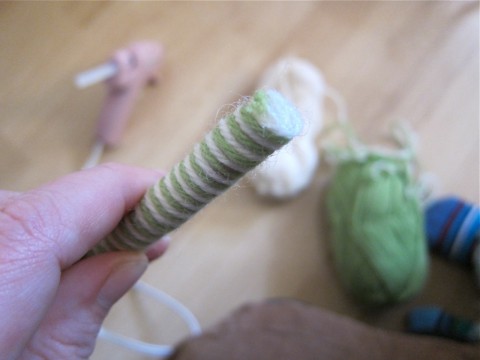
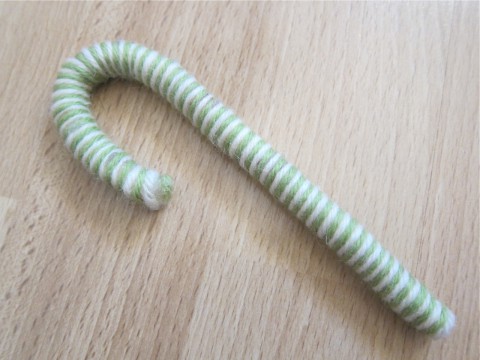
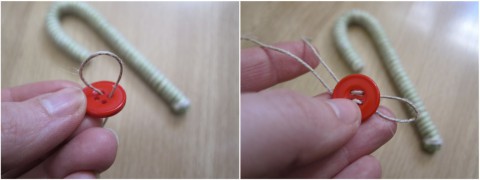
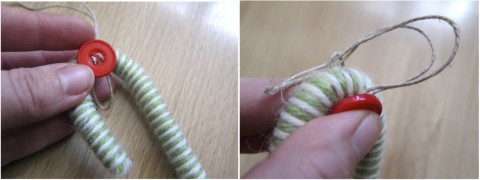
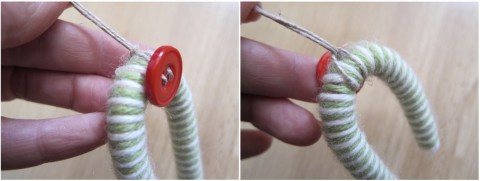
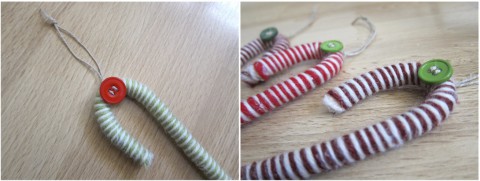
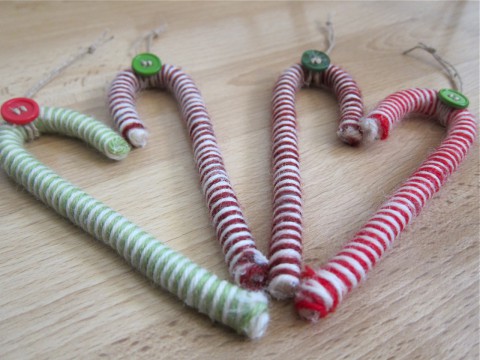
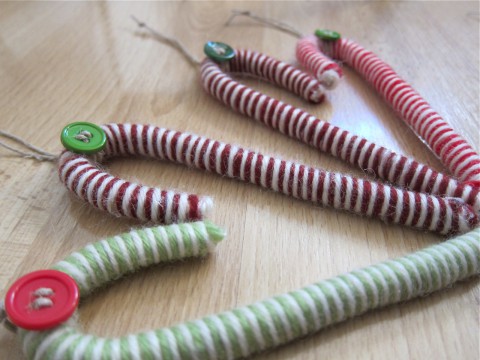
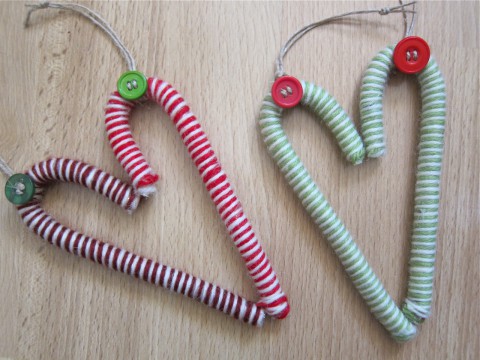
I made a bunch of these to attach to our gift bags for friends & family this year. You could also attach them to the outside of wrapped gifts, instead of using a bow. I’m thinking that next year, I might need to make some into a pretty garland to hang from our fireplace mantel. Lots of possibilities!
Happy last-minute Christmas crafting!
Button-spiration
Let’s look at some more cute Christmas ornament ideas that involve buttons. These ornaments are slightly more work than last week’s ideas, but they’re still not overly complicated. So here are two more possible projects for you to tackle:
The first (and slightly more complex) project comes from Little Things Bring Smiles. She has a well done, full tutorial with lots of photos to walk you through this one. Basic supplies include twigs, pruning shears, felt, & hot glue gun. You can then make it as simple or as complicated as you want by adding bits of pine bough, buttons, twine, berries, and glitter. It looks like a bit of finicky work to glue the small twigs onto the main stems to form the snowflakes, but maybe it’s not too difficult. I’ll give this project a try one year, but it probably won’t get done this year… onto my pile of Christmas Pinterest ideas it goes…
The second project comes from S.C.R.A.P., the cinnamon stick Christmas tree. All you need for this ornament are: cinnamon sticks, wire cutters, scissors, bits of artificial pine, hot glue gun, buttons, and twine. I actually made several of these the other night. They go together fairly quickly, but they do create a bit of mess because I had to trim my bits of artificial pine down, so that they wouldn’t be quite so bushy (if that makes sense). The “pine needles” on my garland were quite long, so I trimmed them all down. In the end, I could only fit three “branches” across my cinnamon stick. I glued on buttons, including some little star shaped buttons that I had on hand, and I did add the little twine bows to some of them because they were so cute. We will likely hang these ornaments on gift bags for our friends & family this year. Which means, I should really get busy and make some more of them!
Hope you are all getting some time to enjoy whatever activities make Christmas special for you, whether that’s baking cookies, writing Christmas cards, decorating your home, making crafts for yourself or gifts for your friends, or helping out in your community! Enjoy this season of hope, love, and generosity!
Button-spiration
Feels like it’s been a while since there was a Button-spiration post. My goodness, my world must be busy, if I’ve managed to neglect my buttons! Well here are TWO craft ideas for Christmas to keep you & your little ones entertained. Simple popsicle stick ornaments:
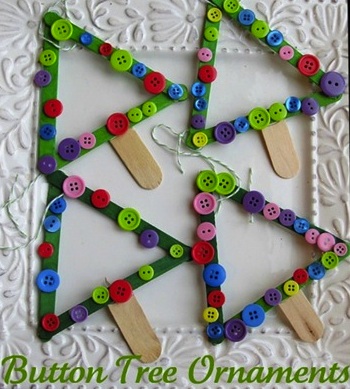
The first project idea comes from Things to Share & Remember. She used a hot glue gun to form the tree shape with popsicle sticks, then let her kids decorate them with buttons using white glue. I like one of her reader’s suggestions, which is to glue a photo in the centre of the tree, so it becomes a little frame. Great gift idea for grandparents!
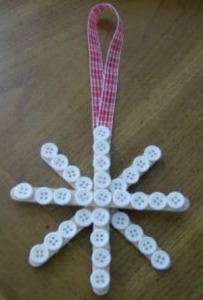
The next project comes from Thrifty Fun. Just glue together 4 popsicle sticks to form a snowflake shape. Then decorate with buttons and attach a ribbon for hanging. Viola! I think these could be pretty hanging from cupboards in kitchens, or even to make a bit of a garland with them to hang from a shelf or fireplace mantel.
Hope you’re finding lots of inspiration these days for simple crafts that make this Christmas season more enjoyable. I’ll likely do a few things here & there, but I’m trying to prioritize Advent as a Christian this year, for once. Which means, more praying & less shopping. It doesn’t necessarily mean “doing” less overall, just focusing that “doing” in a different way (eg. acts of random kindness, volunteering, etc). If you’re interested in an Advent Bible study plan, check out the one the Good Morning Girls is offering. Been enjoying it so far.
Stay warm, safe, & cozy this Wednesday!
Button-spiration
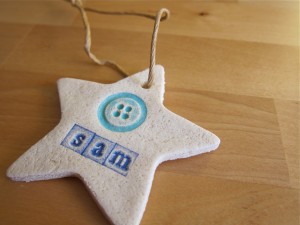
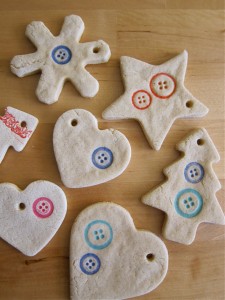 I’ve really been trying hard to do more of the crafts I wanted to complete for Christmas this year. Yesterday afternoon, I managed to complete these salt dough ornaments (with boy in the Baby Hawk because he refused to nap). They aren’t as perfect as I want them to be, but they’ll have to do as a first attempt at salt dough. Of course, I got the idea from Pinterest (where else?!) and I actually used two tutorials for my inspiration. The first was from the Make It Give It blog and the second was from the Intimate Weddings blog (they used the salt dough to make wedding favors).
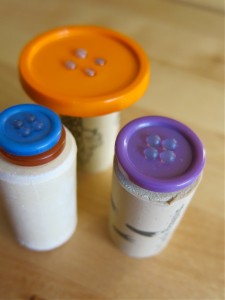
I loved the idea of using rubber stamps & ink to decorate the ornaments! Simple and yet it can make a traditional craft slightly more sophisticated. Of course, I immediately envisioned buttons stamped on these ornaments and since I don’t actually own a rubber button stamp (shame on me), I first had to set about making some stamps. Luckily, that was an easy fix! I glued some buttons onto old wine corks, which I’ve kept around for exactly that purpose. Easy-peasy, right?
Next, I mixed up the dough, using the following recipe (Please Note – in the future I will cut this recipe in half and make two separate batches of dough) :
2 cups flour
1 cup salt
1 cup water
I rolled the dough out to about 1/4″ thick (perhaps even slightly thinner, which I might regret). Then I inked & stamped the designs and used cookie cutters to cut the shapes. I used a straw to make the hole for hanging the ornaments. Then gently placed each one onto a cookie sheet and baked in the oven at 200 degrees for about 5.5 hours. Most tutorials recommend between 4-6 hours. I just pulled them out before I went to bed.
They are pretty darn cute! But I do have a few things I will attempt differently next time. Here’s my tips on this project:
- DO have all your stamps & inks & cookie cutters out and ready to go. The dough starts to dry quickly, so you want to do a lot of prep before you even mix the dough.
- DO make sure you have plenty of time to dry them in the oven. These aren’t going to be done baking in a couple of hours.
- DON’T mix the dough recipe that I have listed on the blog. Cut it in half and make two separate batches of dough. The dough starts to dry quickly (especially in our Alberta climate).
- DON’T try re-rolling the dough to use the left over bits. I think this is one reason why some of my ornaments have cracks. They are so much more pretty when they are nice & smooth.
- DON’T get too frustrated if some aren’t quite perfect. You can always make up more. Even though they take a while to bake, keep in mind that the dough itself is very inexpensive & easy to make.
I would definitely like to make more of these as tags for gifts throughout the year. Love the way they look with names stamped on them! Sam’s first Christmas ornament. I hope he likes buttons as much as his mama…
Button-spiration
Oh, there’s so many lovely button Christmas craft ideas out there, I’m bound to run out of time to post about them this month, not to mention, time to make them! Here is one that I had really hoped to do at our last Pinterest party, but instead I opted to make a wreath for our front door. We’ve got a lot of ornaments as it is, but I thought they would make cute decorations for people’s presents. Maybe next year… The full tutorial for the cinnamon stick Christmas tree (with button ornaments) can be found on S.C.R.A.P.
Source: scrapreusedandrecycledartprojects.blogspot.com via Sarah on Pinterest
Puttin’ the P in Pinterest
The “P” of course being “party”. A couple weeks ago, some friends organized a Pinterest party, with Christmas as the theme. Drinks and snacks were inspired by recipes found on Pinterest and each person who attended brought a Pinterest inspired craft project to work on.
Now if you don’t know about Pinterest yet, well, you’re behind the times and should check it out. Basically you are bookmarking things you’re interested in (whether it’s tutorials, recipes, products, design ideas, beautiful photos, whatever inspires you), but instead of just bookmarking that link, it is saving an image to post to a “design” board. So you can organize your “pins” into categories and have a lovely visual reminder. I use it mainly to collect tutorials and project ideas. Of course, you follow other Pinterest members and get to see what they’ve pinned. It has made me realize how much I miss seeing beautiful photography on a daily basis. When I worked at Veer and Corbis that was something I took for granted. Pinterest has allowed me to re-experience this a bit, as I see all the gorgeous photos pinned by others.
For my party craft project I brought along buttons (go figure), pins and foam balls to make Christmas ornaments. The result can be seen above. Don’t they look like gumdrop candies? Inspiration for this project was found here. They’re a bit heavy, so I skipped adding a ribbon to hang them from the tree (we usually get a real tree, so ornaments need to be fairly light). Instead they will be used to decorate our fireplace mantel. You can see some of the other Christmas projects I’d love to make this year on my Christmas board. Realistically though, I’m more likely to tackle some of the projects for baby in the little time that we have left before its arrival. With some Christmas baking thrown in the mix, of course! You can see the rest of my Pinterest boards and I’ll try to share any of the things that do get made in the coming weeks on here.
Already have a Pinterest account? I’d love to follow you. Leave a link in the comments. Wanna get a Pinterest account? Don’t be intimidated by the “Request Invite” thing… it’s super straight forward and fairly quick.
As they say, Happy Pinning!
Nancy and I (part 3)
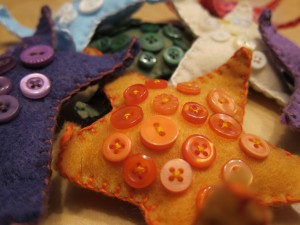 I had all sorts of grand plans of crafting that I wanted to do while I recovered, but I started out with reading. I had stocked up on some new paperbacks (working my way through some Charlaine Harris books) and also pulled the entire Harry Potter series out to re-read. Sipping ginger ale and cranberry juice while reclining with a book became my new routine. Eventually I gained a bit more mental and physical energy and eased myself back into crafting. I started out simple with just some hand sewing. I’d been working on these starfish decorations in between other random projects for a while. It was very relaxing just sorting button and thread colors.
I then moved onto a fairly simple crochet project (“simple” because I didn’t have the patience and energy to worry about counting stitches or working row patterns). My friend at work is expecting her first baby towards the end of October and I was really keen to make her a baby blanket. I already had a bunch of granny squares made-up and it turned out to be the perfect number for a baby-sized blanket. Prior to my surgery, I had the forethought to organize the layout of the squares and number each one, so that when it came to assembling them, it wouldn’t take much mental power. I sat watching an assortment of borrowed dvds (the likes of “The Lakehouse”, “Calendar Girls”, “In Good Company”, “Waking Ned Devine”, etc) and attached granny square to granny square and row to row until I had completed a sweet little autumn baby blanket. More details on this particular project to follow.
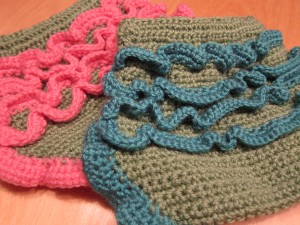 When I finally started to feel like I had the energy to try out a new crochet pattern, I turned to Tina Barrett’s Natural Crochet for Babies & Toddlers. It was love at first sight with this book! For a super avid crafter, I don’t buy a ton of craft books, not because I don’t want to. Seriously, I would go crazy ordering craft books till every shelf in our house was filled and then some, if I could. Being on a tight budget though, I’m often inclined to spend my crafty funds on supplies rather than inspiration. However, Tina Barrett’s crochet book was just too lovely to pass up. I borrowed it from the library originally just to flip through and when I realized I wanted to make every single pattern in the book, I ordered it. The first project I attempted from that book was the nappy pants. So very adorable! Although I wasn’t able to make them out of fancy natural soya or cotton called for in the pattern, since I had to make do with my stash, I think they turned out pretty cute.
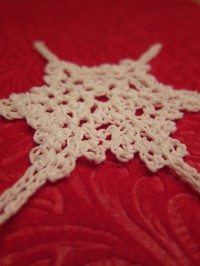
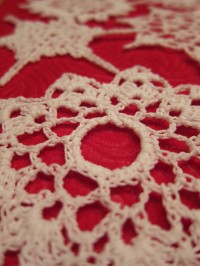
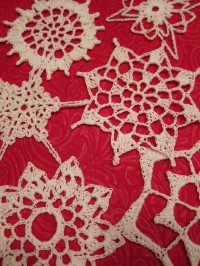
After finishing my first pair of nappy pants I started thinking about Christmas. I haven’t a clue why, but I just started thinking about what to make people for Christmas and that led to thinking about how last year I never got a chance to try making crochet snowflake ornaments for our tree. I mentioned this to my mom and on one of her post-surgery visits she brought all of her old snowflake patterns gathered from magazines from the 80s, white crochet thread and the smallest crochet hook I’d ever seen. Between all of her patterns and ones I tracked down online, I kept busy working up snowflakes. I actually got pretty frustrated trying to make them and I had a hard time reading the patterns, but before I decided that maybe snowflake making was too advanced for me, I tried a pattern posted on Attic 24. Although the Lucy’s pattern uses a DK weight yarn, and I used crochet thread, I loved the shape of the snowflake AND I was finally able to understand how these darn things worked up. So I simply added some more rounds and with my usual improvisation ended up with a nice little snowflake.
It was like a light bulb went on (or I guess in this case a glowing snowflake) and I eventually made these guys too.
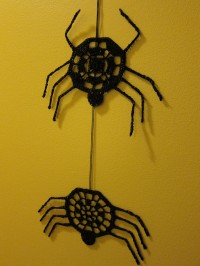
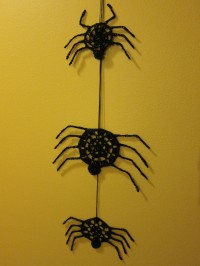
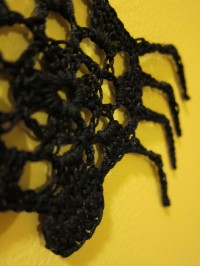
From Christmas, my thoughts turned to Halloween. I know, that was sort of in the wrong order, but who can control one’s crafty thoughts? After my adventures in snowflake making, I started thinking about decorations for Halloween. What could I crochet for Halloween? I liked the idea of making something similar to the snowflakes, that I could starch and hang, but with a Halloween theme. I poked around briefly online, but didn’t find what I had in mind. So I figured I could make it up, after all I had just completed six snowflakes, how hard could it be? After some experimenting, it turned out to be a bit difficult, but not impossible and I managed to created these creepy little friends.
Phew! Well, I managed to complete quite a bit during my weeks of recovery. Definitely didn’t waste the time off and all the lovely crafting kept my sanity!

