Button-spiration: Lace Button Earrings

Aren’t these lace button earrings wonderful?! I love that they make a nice shabby chic style accessory. And of course, super simple to make too! Find the original tutorial on the Evie S. blog. All you need to make these are: two plain buttons, lace, earrings studs, and a hot glue gun. Cut a circle of lace larger than your button. Then simply wrap the lace around the button, gluing the edges on the backside. Let glue cool. Then glue the earring studs on the backside of the button. And you’re done!

Button-spiration: Bag Lady

I’m waaaaay overdue for a Button-spiration post. Have you missed them? I certainly have! Today, finally, a little button love with a simple project. Who can resist a button bag? Certainly not me. In fact, I’m thinking that a trip to Value Village might be in order to find an old purse that I can spend my evenings embellishing with buttons galore. Find the original post on Burkatron.

Button-spiration: In Your Hair

Here’s a fun collection of DIY headband tutorials. All cute, all colourful, and all sorts of button embellishments. I recently discovered that my short hair finally looks good with a headband (it’s the little things that make my day). Now it’s time to get accessorizing!


Fabric headband by Heidi and Finn


Daydreamer Headband by I Am Momma – Hear Me Roar


Pleated headband by Craftiness Is Not Optional


Yarn wrapped headband by Hellobee

Button-spiration: Sassy Things

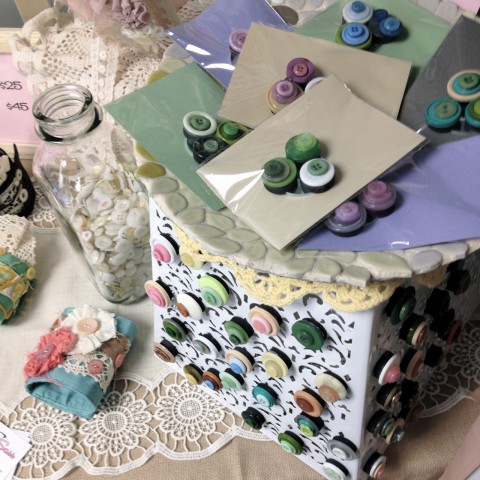
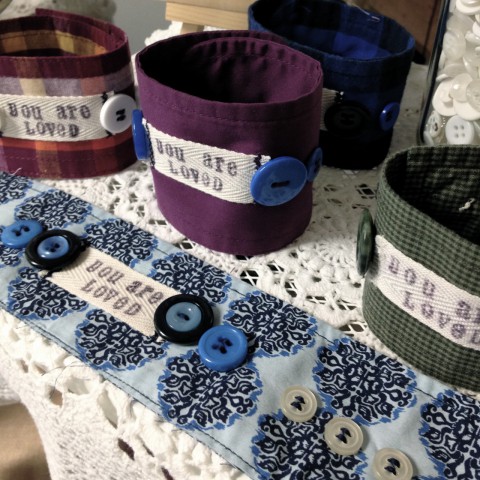
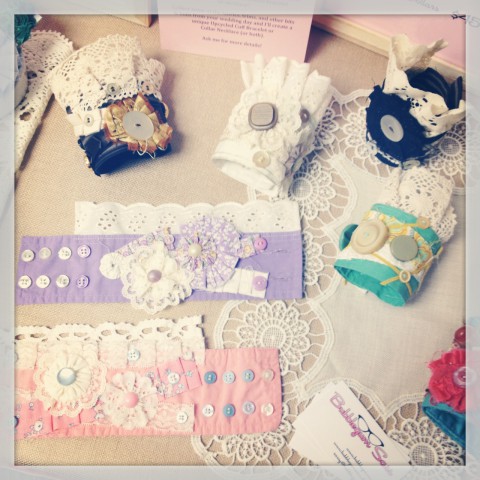
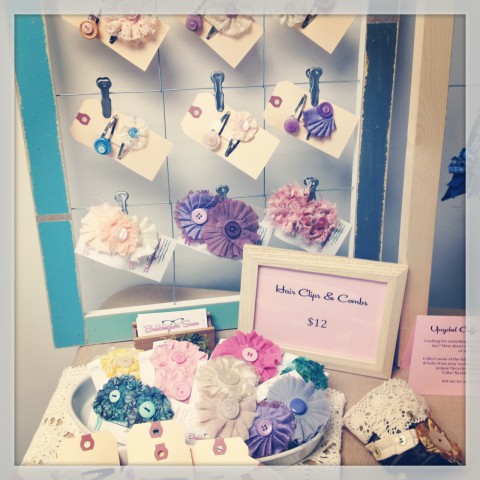
Thought we’d do a little bit of a different Button-spiration this week. I usually end up sharing a tutorial or project of interest by a fellow blogger, but instead I’d like to offer a peek at some of the items I finished up for the Boutique Wedding Market. There’s plenty of button goodness in all of it, of course.

Button magnets (loving my new display for them... a metal waste basket turned upside down)
Button magnets (loving my new display for them… a metal waste basket turned upside down)
"You Are Loved" upcycled cuff bracelets with hand stamped labels.
“You Are Loved” upcycled cuff bracelets with hand stamped labels.
Upcycled cuff bracelets with lots of lace & doilies.
Button hair clips and combs (which were lovingly placed on cute cards by my hubby)
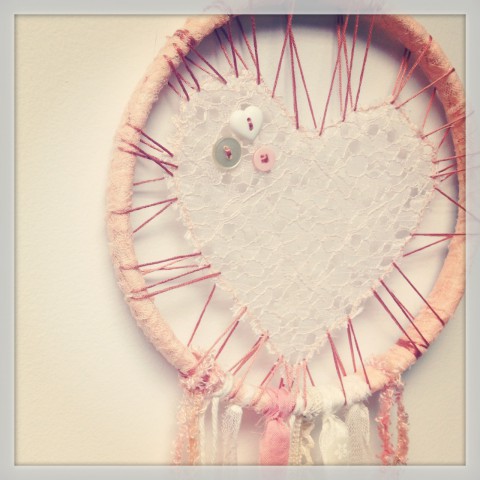
Folks were tickled with my "Love Catchers". I can't wait to get some more made up & listed in the Etsy shop. They may also be for sale soon at a local shop... pretty excited about that! First and foremost, though, I think my little Sammy could use one in his room (perhaps in turquoise & yellow or something).
Folks were tickled with my “Love Catchers”. I can’t wait to get some more made up & listed in the Etsy shop. They may also be for sale soon at a local shop… pretty excited about that! First and foremost, though, I think my little Sammy could use one in his room (perhaps in turquoise & yellow or something).

Button-spiration: Spring Flowers Pt. 4

Ok. Here is to hoping that we won’t need so much spring button flower inspiration going forward (fingers crossed for later this week). Maybe we can just pop our head outside and enjoy actual spring? Just in case you’re one of those poor souls that is still dealing with snow Sadly, we are some of those poor souls still dealing with snow (I wrote this post ahead of time, and seemed to have jinxed us, again… there’s a steady falling of snowflakes out there this morning). This then, is still a much needed project to keep your hopes up.

This pretty button project comes from Ashley of Little Miss Momma. She was inspired by hair pins from Anthropologie and was determined to figure out a simple (and inexpensive) knock-off. I must say, I think she was successful! I like her version even better than the ones from Anthropologie. You can find the full tutorial on her blog.

Ashley used fabric yo-yos from a vintage family quilt (of course, you can make your own yo-yos with the help of Heather Bailey’s great step-by-step instructions). Admittedly, part of the charm of these, is the vintage nature of the yo-yos Ashley used, but you can always score some lovely reproduction fabrics from the quilt shop to tap into that vintage charm. Then all you need are some bobby pins, buttons and a hot glue gun (alternatively, you could hand stitch these all together). Place a bit of hot glue on the end of your bobby pin, press onto the back of your yo-yo. Let cool. Flip the yo-yo over. Place a dab of glue in the center of the yo-yo and squish your button into place. Let cool. Put on a pretty spring blouse, along with your newly made hair pin. Go grab an iced tea & enjoy the day!

Button-spiration: Spring Flowers Pt. 3

Here is the third installment of our spring button flower inspiration. Thankfully, spring seems to have finally arrived in Calgary over the past few days. The snow is gone We woke to snow this morning, but the ground is turning into mud, and we’ve had much needed sunshine! Hopefully you’re starting to experience some of this too, where ever you may be. Or maybe you’re already delighting in the cherry blossoms & daffodils. Just a touch jealous. We have some crocuses starting to pop up.

To keep our spring hope alive, let us turn to this easy-peasy, but adorable project from indieBerries.All you need for supplies are a pile of buttons, different sizes & colours (how much variation or uniformity you want is up to you) and florist wire. She has cute step-by-step illustrations/cartoons on her blog to demonstrate the project. I so very wished I had time to make some of these right now. I feel like our kitchen could use a little bright colour. Alas, the little bits of free time I have are being dedicated to prepping for the Boutique Wedding Market. Perhaps you’ll have a spare moment in the coming days to give these a try? I do hope so. Enjoy!

Button-spiration: Spring Flowers Pt. 2

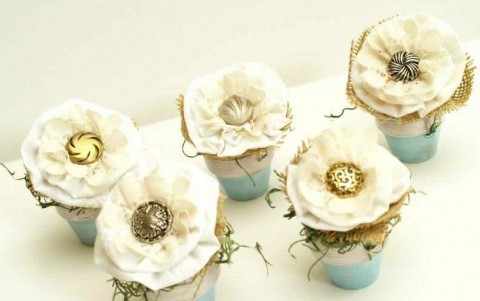
Button flower pots by Flamingo Toes

Here is another adorable spring button flower project to keep you busy until we can enjoy actual flowers in the yard. The full tutorial can be found on the V Spot blog, by special guest blogger Flamingo Toes.

These little potted fabric flowers are actually quite small, only about 4″ tall. You can pick up all sorts of sizes of clay pots at the craft store these days (and they’re usually very inexpensive). You can either paint the pots, or leave them as is, depending on the look you’re going for. You’ll need some stuffing and faux green moss to fill the pots. Next choose some fabric and burlap to make your flowers. Really, you can use any fabric flower tutorial to create the blossoms, it doesn’t necessarily have to be the style she used here. I would likely use some of my scrappy flowers that I use to make the floral hair combs & brooches. However you decide to make your fabric flowers, just pop a button into the centre of each to finish them off.

Pretty darn adorable project to decorate a fireplace mantel, small shelf or Easter dinner centerpiece. In fact, they’re so simple to make, you could put together one for each Easter dinner guest to take home with them. Attach a little name tag to the pot and you’ve got adorable seating place markers. Lots of ways to use these guys! Have fun creating!

Button-spiration: Spring Flowers Pt.1

The official arrival date of spring has come and gone. In Calgary, that typically means we get more snow (no joke). This year is not much different, except that it is unusually cold out still. By now, the temperature is a little more mild, but the last few days have felt like full-on winter again. Le sigh. I am feeling VERY done with the snow & cold this year. I’m longing for those days when we can spend hours outside playing & discovering with Sam. Soon, soon, I keep repeating to myself. Well, not soon enough!

As we wait for the snow to fully melt, the ground to thaw, and a tiny hint of green to poke through, I thought we could embrace some simple spring flower button projects. This one is the first in a series of ideas, all collected on my Button-spiration Pinterest board. This cute egg carton button art project is brought to you by Mod Podge Rocks. She cut up a paper egg carton to form the flower blossoms, then had her kids paint and decorate them. When the blossoms were dry, they glued a button into the center of each. A bundle of pipe cleaners were tied with a ribbon to create the flower stems. Everything was then glued into place on a canvas (which she had painted beforehand, although you can now purchase coloured canvases from the craft store, if you’re short on time).


Sammy and I are using this flower egg carton idea to decorate a spring wreath. Hubby made a large twisted twig wreath several years ago, which we hang on the front door at this time of year. It needs a bit of colour to offset the current dreariness these days, but I don’t want to permanently attach anything to the wreath. I like the idea of having a wreath we can decorate a few different ways. I’ll get Sammy to paint & decorate the egg carton blossoms, then poke two holes through the bottom of each blossom & attach some yarn, so we can just tie them onto the wreath. Once the yarn is through the holes, we can cover it up with a button in the center of each blossom. I’ll try to remember to a) take pictures as we finish working on this and b) find the time to post them.

Until then, have fun playing around with your egg carton flower art!